Budget-Friendly Hair and Makeup Tips Every Glam Gal Needs to Know
Achieving a glamorous look doesn’t have to cost a fortune! In this article, we’re diving into some budget-friendly hair and makeup tips that anyone can use. Whether you’re getting ready for a special occasion or just want to feel fabulous every day, you’ll find some great ideas here that won’t break the bank.
First off, let’s talk about the common belief that beauty requires pain and sacrifice. You know the saying, “No pain, no gain”? Well, we’re here to say that’s not true at all! With the right makeup, skincare, and hair techniques, you can look amazing without enduring discomfort or spending loads of money.
What’s really exciting is that you can achieve stunning results using everyday items you probably already have at home. Imagine transforming your look with things you didn’t even know could work wonders!
Let’s get into some straightforward, easy, and cost-effective beauty tips that will really elevate your appearance.
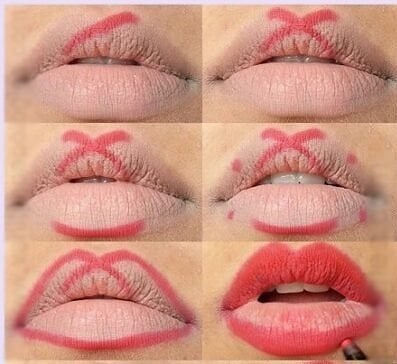
Draw an X to Get That Perfect Pout Every Time
We all love a bold, rich lip color, but let’s be honest—applying it can sometimes feel like an Olympic sport. One wrong move, and you could end up looking like you just participated in a food fight! But don’t worry, I’ve got a fantastic trick that will help you nail that perfect pout every time.
Start by focusing on your cupid’s bow, that cute little dip in the middle of your upper lip. Here’s where the magic happens: create a symmetrical X right in the center. Yes, you heard that right—just like a treasure map! Extend those lines outward to shape the rest of your lips. Who knew that X marked the spot for lip perfection?
Now, let’s talk about the finish. Once you’ve got that outline looking sharp, fill in the rest of your lips with color. You’ll be rocking lips as fabulous as Kylie Jenner’s in no time!
Incorporate this simple technique into your daily routine, and you’ll not only save yourself from the lip color struggles, but you’ll also step out with a polished look that’s totally on point. Trust me, mastering this will take your makeup game to a whole new level!
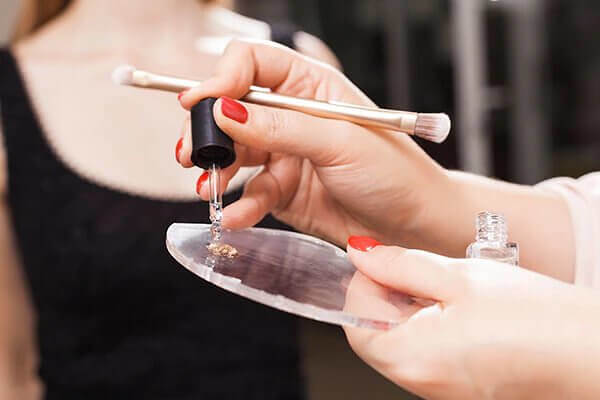
Pros Mix Face Oil With Foundation for the Perfect Glow
Trying to recreate those flawless Instagram looks can often leave us feeling a bit frustrated. Let’s face it: many influencers rely on tools like Facetune and Photoshop, and natural lighting can change how everything appears. But hey, we can still amp up our makeup game without a mobile filter!
Here’s a pro tip straight from experienced makeup artists who prep for photoshoots: consider using a bit of lubricant—yes, you heard me right! Now, this might not be the best option for those with super oily skin, but if you have dry skin, this trick can work wonders.
By adding just a tiny drop of oil to your liquid foundation, you’re essentially transforming it. This little tweak creates a beautiful, radiant finish that looks fresh and luminous. It’s all about that glow!
So, next time you’re getting ready, give this technique a try. You’ll find that achieving that gorgeous, dewy look is easier than ever, and who knows? You might just feel like an Instagram star yourself!
Numb Before You Wax
Grooming has been a part of human life since the days of cavemen, and it’s safe to say that both men and women have their own routines when it comes to looking and feeling their best. For many, achieving that smooth, seal-like finish is the goal. But let’s be real: shaving your legs and underarms can feel like an endless chore. It’s repetitive and often tedious, which is why some people turn to waxing as a way to cut down on time.
Waxing does last longer since it pulls hair out from the root, but let’s not sugarcoat it—it can be downright painful! The thought of that discomfort can make anyone reconsider. But fear not! There’s a way to make the experience a bit more bearable.
Here’s a tip: try using a topical anesthetic lotion before your waxing session. Just apply it as directed on the packaging, and give it time to work its magic. You might be surprised at how much more comfortable your waxing experience can be. Some waxers even swear by this method to help their clients feel at ease!
So, if you’re looking to smooth things out without the scream-fest, this could be your secret weapon. With the right prep, you might just have the most pleasant waxing session ever!
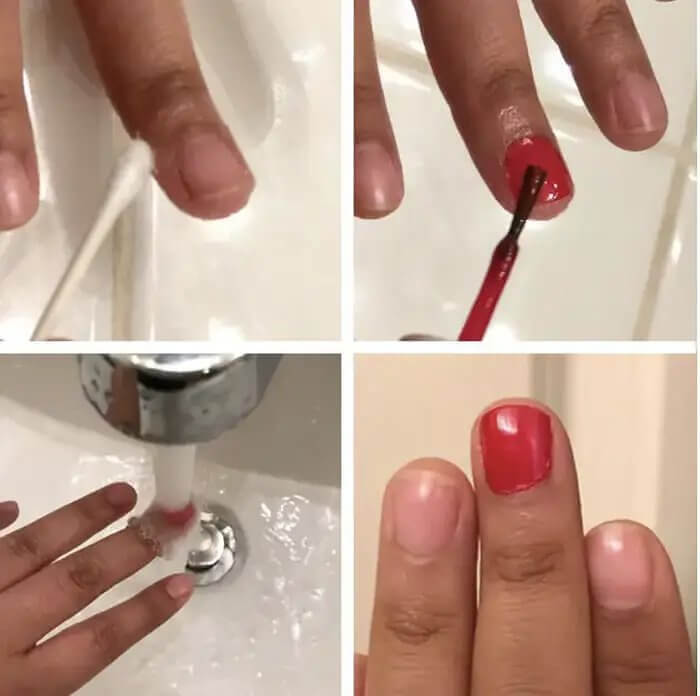
Use Vaseline to Catch Stray Paint During At-Home Manis
If you’re not keen on splurging for a professional manicure, don’t worry! You can easily pick up a budget-friendly bottle of nail polish at your local pharmacy. However, applying it can sometimes feel like a challenge, and it might end up looking like a toddler—or even a gorilla—had a go at it!
Here’s a nifty trick to make your DIY manicure a lot cleaner and easier: apply a layer of petroleum jelly (like Vaseline) around your nails before you start painting. Just put a thin line around each nail, then go ahead and apply your polish as usual.
So, why do this? The Vaseline creates a barrier that prevents the polish from sticking to your skin. When you’re done, all you need to do is wash your hands with soap and water, and it’ll easily wipe away any excess polish. No need for marathon showers or waiting for days to scrape off the leftover mess!
This little hack not only saves you time but also ensures your nails look salon-fresh without the hassle. Give it a try, and you might find yourself with a polished look that rivals any professional manicure!
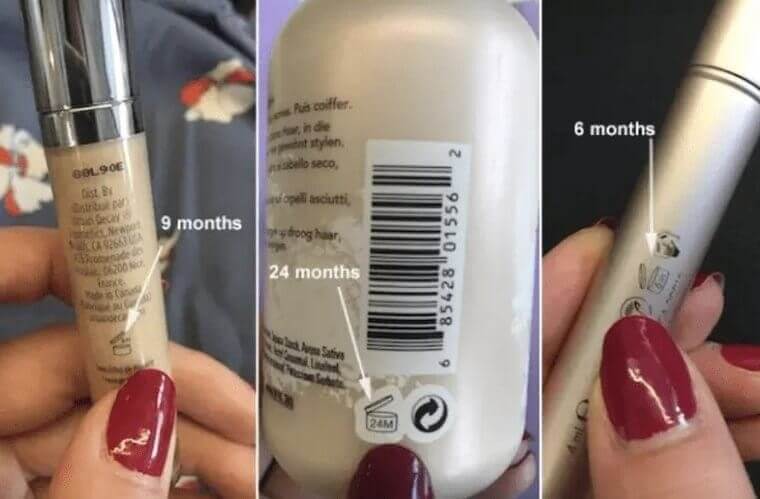
Know Where To Look to understand product shelf life
We all know that food and medicine come with expiration dates, but how often do we think about our makeup products like lipstick and creams? Believe it or not, they have expiration dates too! Each product has its own unique formulation, and that affects how long it will last.
Next time you’re rummaging through your beauty stash, take a moment to look for that little symbol on the packaging. You might have noticed a small jar icon with a number inside it. This is your key to understanding how long a product is good for after you’ve opened it. That number represents the number of months the product remains usable, so if it says “12M,” for instance, it means you’ve got a full year to enjoy it after opening.
Additionally, you might find a long-term expiration date printed somewhere else on the packaging, indicating how long the product will last if it’s never opened. Both these pieces of information are super important to keep in mind!
Keeping track of these dates helps you avoid using products that could be past their prime, ensuring your skin stays healthy and your makeup looks its best. So, the next time you’re applying your favorite lipstick or cream, give that little jar symbol a glance—it could save you from an unexpected beauty blunder!
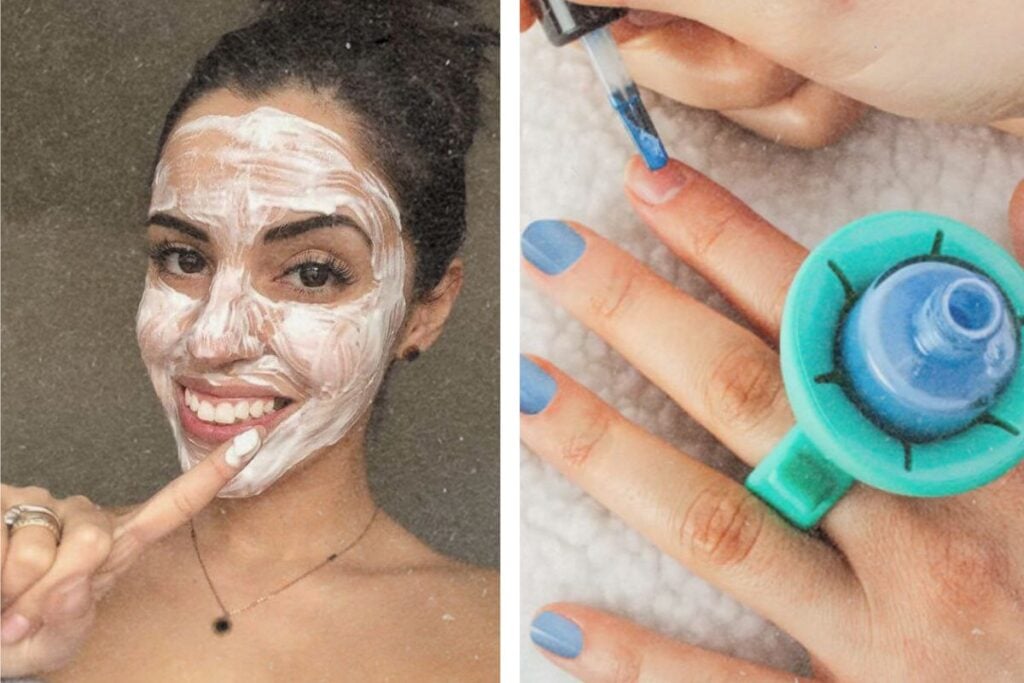
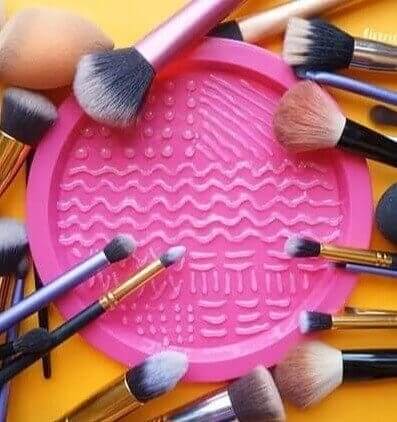
Make This DIY Brush Cleaner With Two Basic Supplies
Keeping your makeup brushes clean is super important for your skin’s health. Think about it: using a dirty brush just spreads bacteria all over your face, and nobody wants to deal with extra acne on top of what they already have!
Here’s a clever DIY solution to help you clean those brushes easily with just two items you probably already have at home: a paper plate and a glue gun. It’s simple and can even look nice enough to display!
First, grab your paper plate and start creating some little, curving lines with your glue gun. You can get creative and make them in a fun design that suits your style. Once the glue has dried, you’ll have ridges on the plate that will really help when it comes time to clean your brushes.
When you’re ready to wash your brushes, just add a bit of soap and a splash of water to the plate. Then, scrub your brushes against the ridges. The friction created by the grooves will help remove all that buildup, leaving your brushes squeaky clean!
This easy, homemade cleaning device not only keeps your brushes in top shape but also helps protect your skin from breakouts. Plus, it’s a fun little craft to add a personal touch to your beauty routine!
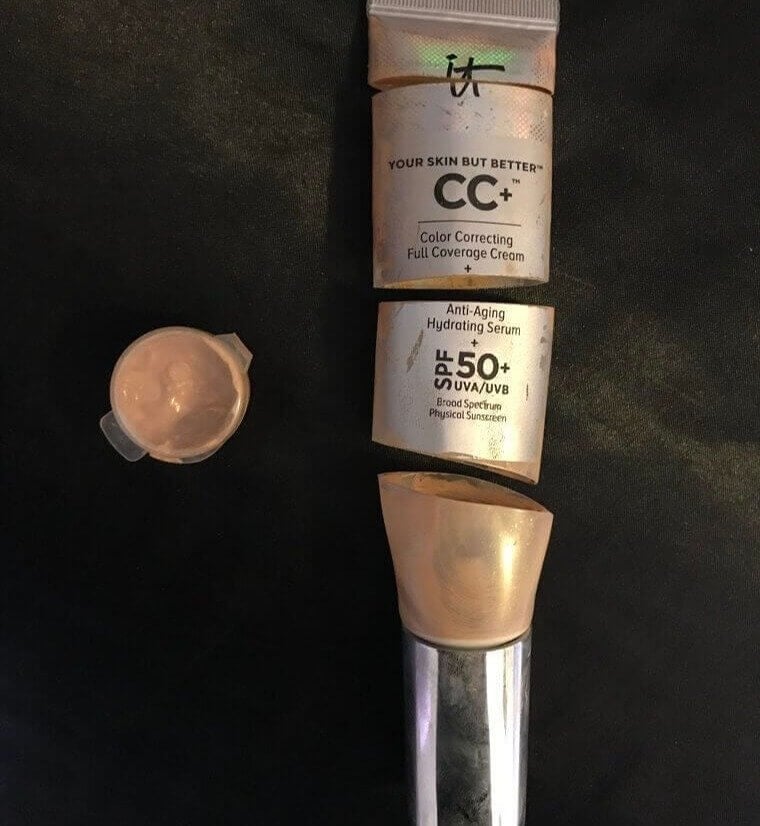
Cut That Tube and Use Every Last Drop of Your Makeup
Trying out every new cosmetic on the market can really add up, can’t it? We often find ourselves tempted by new colors and formulas, and in the process, we might overlook how much product we already have. But if you’re looking to get the most bang for your buck, here’s a handy tip that can help you minimize waste: don’t be afraid to grab those scissors!
When your favorite tubes are running low, it can be a bit nerve-wracking to cut them open, especially if they’re all beautifully packaged. But here’s the thing: think about how much product gets stuck at the bottom! Instead of tossing that tube and losing all that good stuff, take a moment to snip it open.
You’ll be amazed at how much product is left inside once you do! It’s often more than you’d expect, and those extra bits can really extend the life of your favorite products. Plus, this little hack can help you save money in the long run.
So next time you’re nearing the end of a tube, don’t just throw it away—cut it open and see what you can salvage. You might just discover some hidden gems and get more use out of your cosmetics!
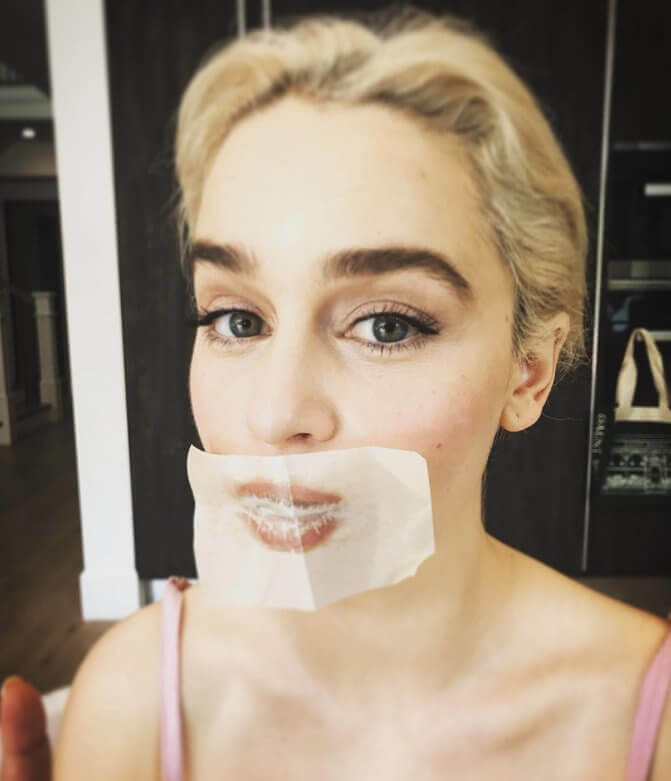
Make Lipstick Last Longer Like the Red Carpet Stars
Let’s be real: unless you’re opting for long-wearing formulas, your lipstick probably won’t last all day and night. But don’t worry—there are some tricks you can use to help your favorite shades stick around longer! We’ve got some insider tips straight from the red carpet.
Here’s a technique you can try: Before a big event, makeup artists often prep celebrities’ lips by applying a thin layer of lipstick and letting it dry. After that, they gently blot the lips with a napkin to absorb any excess product. But what’s the next step?
Here’s where it gets a bit unconventional: dust a light layer of translucent powder over your lips. I know it might sound odd, but this helps set the lipstick and keeps it in place. Once you’ve done that, go ahead and apply a second coat of your lipstick.
This method may feel a little strange, but many makeup enthusiasts swear by it! It’s definitely worth a shot, especially if you’re looking for a way to keep your lips vibrant throughout the day. So why not give it a try at least once? You might just find yourself with a longer-lasting lip look!